The following guide will give you some insight into the Mystic class in TERA Online. This class is quite popular among players, however many people have quite a lot of questions about it, so hopefully this Mystic guide will help you answer some of them. Here’s what it contains:
- Introduction: Arms and Armor, Skills Overview, Party Role, Races
- Skills & Spells
- Class Mechanics
- Mystic Facts, Caster Mana Pool, Spellweaving, In/Out of Combat
- Longevity: Placement, Teleport Jaunt, Aura of the Swift, Conclusion
- Mana Regeneration: Passive Regeneration: Basic Regeneration, Passive Regeneration: Crystals, Reactive Regeneration, Active Regeneration: Mana Infusion, Active Regeneration: Essence Drain, Active Regeneration: Arun’s Tear (Mana Orbs), Conclusion
- Dispatching Orbs: Mechanics, Fortifying Camps, Drawing Circles, Aggro Management
- Pet System: Thrall of Protection, Thrall of Vengeance, Thrall of Life, Destruction Spirit, Conclusion
- Auras and Buffs: Buff, Auras
- Gameplay
- Tips & Tricks: Damage Calculation, Itemization, Scaling, Spreading Damage
- Soloing & Duoing: DPS Cycles, Sharan Bolt, Spirit Wave, Wrath of the Earth, Spirit Drain, Curse of Agony, Spirit Summon: Lightning
- Conclusion
Introduction
 If your idea of fun is to head into battle with a combat pet at your side, wielding primal powers to harm and heal, empowering your allies while cursing your enemies, you may want to walk the mystic’s path.
Mystics operate in many different niches. They fight at close quarters, healing and boosting their allies, draining and destroying their enemies. They channel powerful auras to enhance whole groups. They summon allies to draw attention, to fight, to heal, or summon entire parties from one location to another. Add extensive crowd control and the capability to resurrect fallen allies, and you can see why the mystic is a critical factor in any successful party.
Arms and Armor
The scepter is the focus of a mystic’s magic, which emanates from the world around him. With this instrument of power, mystics perform a wide array of skills for healing and harm. Their armor, like that of all arcanists, is robes of cloth, but their skills – and their magical pets – ensure their survival on the battlefield.
Using the power of their scepters, mystics drop healing orbs, apply short-term boosts to attack power and speed, drain hit points, and restore mana points, all while doing respectable amounts of damage using their terrific area-of-effect attacks. They stun, curse, sear, smite, and otherwise deal death to their foes. They convert the life force of their enemies into mana for their party, and summon creatures of the world to aid them in battle. Small wonder they earn the respect of other classes for their power and versatility.
Skills Overview
Mystic skills focus on supporting their allies and controlling the flow of battle. Though able to contribute to overall damage, mystics really shine when enhancing their allies with auras or snaring and stunning their foes. They have a superb area-of-effect attack that damages their foes while also replenishing the mana of party members. With a simple gesture, mystics can remove enhancements from their foes and debilitating effects from their allies.
Mystics can teleport away from danger, or summon their allies together for a quick regroup. Their resurrection skills make them popular comrades on the field of battle. When all else fails, mystics call on their magical allies to aid them—a guardian to draw a foe’s attention, an avenger to inflict pain and suffering, or a healer to keep the mystic healthy.
Party Role
Mystics provide in-battle enhancement and replenishment while offering superlative crowd control and respectable damage. They add to the longevity of any party, can seize an out-of-control situation and dominate it until their allies are on the offensive again, or simply unleash their own magical fury. Because cloth armor offers little protection, mystics must time their escapes well and always know what’s going on in a fight. Mystics make their comrades better at what they do—and a whole lot more.
Races
The most unwanted question you will ever find for every MMO that have a Class/Race system of the sort. There is nothing like “Race stats” in Tera online, but there are some Racials skills, active and passive. You will find a list of them here (coming soon). If you are only watching the paper, basically Humans and Castanics do the trick because of their Racials. However it’s been heard that changes will be made in order to get a more “useful & balanced” Racials skill system, keep on track.
I’ll tell you what I’ve told to EVERY single player that asked once “what’s the best race to be a…”: play what you want to play. It’s as simple as this. Really, Racials will only help you one fight every couple of hours or so, don’t pick a race you’ll not like. Because playing something you like will satisfy you, and that’s why you’re playing a game!
Skills and Spells
This is a list of the Mystic skills & spells. The name has been changed. They are now correct with the English Beta test version. I’ve also added some information based on my perception of the game: The Locking Type (in ‘Target’).
Locking Type:
- Lock on – Means you have to wait for the client to accept your target(s). They’ll be highlighted in green.
- Following – Means you’ll only have to have the cross hair on the target when activating the skill. Even if the target moves, it will hit it.
- Standard – Mean the projectile will not automatically hit the target; you have to aim considering its movement.
- Circle – Mean the skill is deploy a ground pattern hence including every possible target in the AoE.
 Sharan Bolt
- Obtained: 1 / 4 / 10 / 16 / 22 / 28 / 34 / 40 / 46
- Power: 11 / 13 / 19 / 28 / 41 / 59 / 87 / 126 / 184
- Mana Cost: 32
- Range: 20m
- Target: Following
- Cast: Instant
- Cool down: None
- Upgrade: Power up [+25% Power].
- Description: Blast a fast spiritual shot. Damages are decreased after 10m.
 Arun’s Vitae
- Obtained: 1 / 6 / 12 / 18 / 24 / 30 / 36 / 42 / 48
- Healed: 103 / 136 / 189 / 262 / 363 / 502 / 693 / 957 / 1322
- Mana Cost: 400
- Cast: 1.3s
- Cool down: 5s
- Upgrade: None.
- Description: Create a Life orb in front of the Mystic. The Orb stays for 5 minutes, and is dedicated for the group the first 2 minutes. Picking the Orb gives a Heal over time for 7 seconds, ticking every second plus dispell any negative effect.
 Mana Infusion
- Obtained: 2
- Regen: 100/s
- Target: Self
- Cast: 4.5s
- Cool down: 10s
- Duration: 20s
- Upgrade: Regen up [+20% Regenerated].
- Description: Buff up the caster’s Mana regeneration. it will wear off if any offensive action is taken, or upon being directly hit.
 Metamorphic Blast
- Obtained: 2
- Enhanced: 8 / 14 / 20 / 26 / 32 / 38 / 44 / 50
- Power: 26 27 / 55 / 80 / 116 / 170 / 248 / 362 / 528
- Mana Cost: 163
- Range: front : 7.5m side: 3.5m
- Cast: Instant
- Cool down: 2.5s
- Lock: 180° Front
- Upgrade: Power up [+25% Power].
- Description: Launch two consecutive Spirit waves dealing damages in front of the caster.
 Thrall of Protection
- Obtained: 4
- Enhanced: 8 / 12 / 16 / 20 / 24 / 28 / 32 / 36 / 40 / 44 / 48
- Mana Cost: 875
- Cast: 2.8s
- Cool down: 10m
- Upgrade: Focus [10% Cool down reduction]
- Description: Summon a Spirit Guardian for 10 minutes or until it dies. It will assist the caster. Generate a great amount of threat. It will sometimes knock down the target.
 Metamorphic Smite
- Obtained: 6
- Enhanced: 14 / 20 / 26 / 32 / 38 / 44 / 50
- Power: 59 97 / 142 / 207 / 303 / 442 / 645 / 941
- Mana Cost: 250
- Range: 20m
- Cast: 1s
- Cool down: 5s
- Lock: Frontal small Circle
- Upgrade: Focus [10% Cool down reduction] – Bond [-41 Mp]
- Description: Deal a fair amount of damages with high knock-down chances in an AoE in front of the caster.
 Teleport Jaunt
- Obtained: 8
- Mana Cost: 120
- Cast: Instant
- Cool down: 10s
- Upgrade: Impulsion [+25% chance to reset cool down].
- Description: Teleport the Mystic 14 meter away in the camera direction.
 Corruption Ring
- Obtained: 10
- Enhanced: 16 / 22 / 28 / 34 / 40 / 46
- Power: 14 21 / 31 / 45 / 66 / 96 / 140
- Mana Cost: 625
- Range: 7m
- Cast: Instant
- Cool down: 15s
- Lock: Centered Circle
- Upgrade: Protection [-50% incoming damages] – Premonition [+300% knock down resistance] – Bond [-100 MP]
- Description: Channel a drain around the caster during 10 seconds. When finished, the spell changes. Allowing the caster to revert the life absorbed into Mana for allies around him. The more damages done, the more Mana regenerated.
 Retaliate
- Obtained: 12
- Enhanced: 18 / 24 / 30 / 36 / 42 / 48
- Power: 45 66 / 96 / 141 / 205 / 300 / 437
- Cast: Instant
- Cool down: 15s
- Lock: Centered Circle
- Upgrade: Power up [+25% Power] – Focus [10% Cool down reduction].
- Description: Only usable when the caster is knocked-down. It removes the knocked-down state unleashing a powerful close range attack.
 Thrall of Vengeance (Also called ‘Summon: Elemental of Lighting’ by some patch notes)
- Obtained: 12
- Enhanced: 16 / 20 / 24 / 28 / 32 / 36 / 40 / 44 / 48
- Mana Cost: 875
- Range: 20m
- Cast: Instant
- Cooldown: 22s
- Upgrade: None
- Description: Summon a spirit of Lightning – 6 meters away – that will assist the caster for 17 seconds, dealing moderate damages.
 Volley of Curses
- Obtained: 14
- Enhanced: 20 26 32 38 44 50
- Power: 82 119 174 254 372 541 789
- Mana Cost: 163
- Range: 15m
- Cast: Instant & Mobile
- Cool down: 1.4s
- Lock: Lock-On
- Upgrade: Duration [20% additional duration] – Bond [-33MP]
- Description: Poison the target for 10 seconds, dealing continuous damage each 2 second. It can be stacked up to 3 times.
 Sonorous Dreams (Also called ‘Sleeping Sands’ by some patch notes.)
- Obtained: 14
- Enhanced: 44
- Mana Cost: 750
- Range: 18m
- Cast: Instant & Mobile
- Cool down: 35s
- Lock: Lock On
- Upgrade: Bond [-150MP]
- Description: Mesmerize 2 targets for 18 seconds in PvE, 8 seconds in PvP.
 Spirit Cleanse
- Obtained: 16
- Mana Cost: 32
- Range: 19m
- Cast: Instant
- Cool down: 2.5s
- Lock: Lock on
- Upgrade: Tracking [+2 Targets].
- Description: Remove all negative effects on 2 allies.
 Thrall of Life
- Obtained: 16
- Enhanced: 20 / 24 / 28 / 32 / 36 / 40 / 44 / 48
- Mana Cost: 875
- Cast: Instant
- Cool down: 35s
- Upgrade: Focus [10% Cool down reduction]
- Description: Summon a Fairy spirit, healing with Priest’s skills. It will dispel, heal single x2, heal AE, HoT and AE dispel for 12 seconds.
Titanic Favor

- Obtained: 18
- Enhanced: 24 / 30 / 36 / 42 / 48
- Power: 1335 1848 / 2555 / 3529 / 4874 / 6729
- Mana Cost: 350
- Range: 19m
- Cast: 1s
- Cool down: 2.5s
- Lock: Lock on
- Upgrade: Tracking [+1 Target].
- Description: Heal up to two targets and adds a HoT for 10 sec.
 Resurrection
- Obtained: 18
- Power: 11
- Mana Cost: 1700
- Range: 4m
- Cast: 7s
- Cool down: 20s
- Lock: Small circle front
- Upgrade: Focus [50% Cool down reduction] – Bond [-500Mp]
- Description: Resurrect one target (the closest in front of the caster).
 Aura of the Swift
- Obtained: 20
- Mana Cost: 125
- Range: 20m
- Cast: Instant
- Cool down: 2s
- Upgrade: Bond [-50Mp]
- Description: Enchant the Mystic’s group, gaining +10% move speed in and out of combat. The aura will continually drain 30 MP each 2 seconds from the caster.
 Summon Group
- Obtained: 22
- Mana Cost: 1000
- Cast: 4.5s
- Cool down: 20m
- Upgrade: Bond [-640Mp]
- Description: Summon the whole Mystic’s group to his position. Work only in the same zone.
 Regression
- Obtained: 24
- Enhanced: 50
- Mana Cost: 1000
- Range: 8m
- Cast: Instant
- Cool down: 1min
- Lock: Medium centered Circle
- Upgrade: Focus [25% Cool down reduction]
- Description: Dispel all Buffs on each hostile target around the Mystic.
 Titanic Wrath
- Obtained: 26
- Mana Cost: 875
- Range: 8m
- Cast: Instant
- Cool down: 8s
- Lock: Small front circle
- Upgrade: Duration [35% additional duration] – Bond [-100MP]
- Description: Raise the attack power of allies around the Mystic by 20% for 25seconds.
 Aura of the Unyielding
- Obtained: 26
- Enhanced: 38
- Mana Cost: 250
- Range: 20m
- Cast: Instant
- Cool down: 2s
- Upgrade: None.
- Description: Enchant the Mystic’s group with the power of fog, gaining +30% (+40%@38) increased critical resistance. The aura will continually drain 30 MP each 2 seconds from the caster.
 Arun’s Tear
- Obtained: 28
- Mana Cost: 500
- Cast: 1.3s
- Cool down: 5s
- Upgrade: None
- Description: Creates a Mana orb in front of the Mystic. The Orb stays for 5 minutes, and is dedicated for the group the first 2 minutes. Picking the Orb gives 639 MP.
 Mire
Mire
- Obtained: 32
- Mana Cost: 750
- Range: 18m
- Cast: Instant & Mobile
- Cool down: 1m
- Lock: Lock on
- Upgrade: Focus [20% Cool down reduction]
- Description: Ensnare two targets by 90% for 5 seconds but increase their knock-down resistance by 100%.
 Aura of the Tenacious
- Obtained: 36
- Mana Cost: 750
- Range: 20m
- Cast: Instant
- Cool down: 2s
- Upgrade: None
- Description: Enchant the Mystic’s group, The aura will continually drain 30 MP each 2 seconds from the caster.
 Thrall of Obliteration (Also called ‘Summon: Elemental of Destruction’ by some patch notes)
- Obtained: 38
- Enhanced: 42 46 50
- Mana Cost: 1250
- Cast: Instant
- Cooldown: 10m
- Upgrade: None
- Description: Summon a spirit of destruction, taking a Golem form. It will attack once and disappear.
 Vow of Rebirth
- Obtained: 42
- Mana Cost: 250
- Range: 4m
- Cast: Instant
- Cool down: 15
- Lock: Ahead
- Upgrade: Focus [40% Cool down reduction]
- Description: Buff the closest ally in front of the Mystic, upon death he’ll be able to resuscitate automatically.
 Ancient Binding
- Obtained: 42
- Mana Cost:437
- Range: 18m
- Speed: Slow
- Cast: Instant
- Cool down: 30s
- Lock: Standard
- Upgrade: Duration [50% additional duration]
- Description: Blast a slow bolt dealing no damage but snaring for 50% for 5 seconds.
 Curse of Exhaustion
- Obtained: 46
- Mana Cost: 1000
- Range: 18m
- Cast: Instant & Mobile
- Cool down: 3m
- Lock: Lock on
- Upgrade: Focus [20% Cool down reduction]
- Description: Disenchant 4 targets, making cool-downs 20% longer for 20seconds.
 Shara’s Lash (Also called ‘Flash shot’ in some patch notes)
- Obtained: 50
- Mana Cost: 500
- Range: 10m
- Speed: Fast
- Cast: Instant
- Cool down: 15s
- Lock: Standard
- Upgrade: Duration [40% additional duration]
- Description: Blast a slow bolt dealing no damage but will stun all targets in a small AoE.
 Aura of the Merciless
- Obtained: 50
- Mana Cost: 750
- Range: 20m
- Cast: Instant
- Cool down: 2s
- Upgrade: Bond [-300MP]
- Description: Enchant the Mystic’s group with Rage, dealing 100% more critical damage.
Class Mechanics
As a Mystic, I would add that you have to predict everything that will happen to suit perfectly your role. The class is rated 5 starts in the class selector, and this is not for nothing. The very first thing you have to like in playing a Mystic is to Lead – or at least, lead the support in the group.
A Mystic might excel in everything, from keeping a fair DPS amount to healing a full party on a deadly boss. But for both, you have to get some experience on the game. Learning mobs and mates patterns (especially mates), how do they move, when will they move, when do they needs Mana, how do they back up, etc.?
Every single aspect of a fight is important for a Mystic. You’ll ALWAYS have something to do: support, harass, prepare orbs or damages dealing.
Now we have a base to refer to. We’re going to talk a lot about every aspect of the class, which goes without saying, about the game mechanism of each spells. How do they work? How do they scale? What chain gives the best DPS results? Etc. At this point, most of the theory crafting is still on my “to do” list. If you want to help, feel free to contact me.
Recommended: Tera Mystic Guide
Includes more detailed class mechanics, spells and builds, leveling guides, gold farming strategies, PvP tactics, and more.
Mystic Facts
Caster Mana Pool
You should have noticed the “big” swimming Mana pool you’ll get at the beginning of the game. Every class in Tera does not see this pool vary a lot, and it’s hardly like it will go over 2 times upon reaching level 50. You will notice that each spell of the Mystic has a specific Mana cost, which stays the same regardless the rank or level of the spell. This could roughly means: “your gameplay won’t evolve at all”. This statement is hopefully quite false – as you will see – because you’ll gain news key abilities that will greatly affect the overall gameplay of the Mystic – renewing it.
Spellweaving
I know you are, as me, tired of the classical MMO where you can hear the so lame “Not enough Mana”, well those days are over!.. or not. At least, you won’t hear this in Tera. The fact is, when casting a spell, regardless of it’s casting time, you’ll invest 50% of the Mana cost of a spell upon hitting your hotkey. Meaning you can lose a very great deal of mana, just launching spells without taking any care.
For example, as it will happen, eventually your tank will die, and you’ll have rez him. However, you’re the second aggro in Tera, meaning, that launching a 1k7 MP Cost spell isn’t wise until the aggro ring is over someone else. Canceling that rez because the boss’s rushing you will make you lose 850 MP, which is a freaking lot when your tank is dead and everything seems to accelerate. Know this fact !
In/out of combat
Actually, the combat mechanism is a bit broken, or at least, I think it is.
You’ll find yourself pushed out of combat more than half on the group fighting time, because you’re not doing any damage to mobs. This is not really a problem; you’ll get loots and experience like you were 100% in combat mode. However you’ll also gain the “Go in Peace” passive buff, increasing your out of combat run speed. You have to be aware of it, because in some situation running faster means, getting closer to the mob as well. Getting closer means… well, you’ll see by yourself!
As a bit more of explanation here a Q/A quoted from Terafans.com:
Alkys7 : “I have a question on this – So if you aren’t doing damage to a mob then you are out of combat? regardless of if you are healing/debuffing/ccing? and that your party is all in combat?”
Manta : “You are indeed pushed out of combat after a couple of seconds when not doing any hostile actions. Debuffing, CCing or attacking are valid hostile actions, while Healing or summoning pets are not considerate as hostile.
So if you stick with healing/dispatching orbs, you’ll get soon out of combat. Then, you’ll “benefit” out of combat buffs, like the speed bonus.
Longevity
Mystics are one of the top most mobile classes in Tera. Cloth armors are not absorbing any damage at all, and it’s more likely you’ll be trampled and killed on the spot by any angry Mini Bosses.
Well then, Mobility and prediction are definitively our greatest weapon.
Placement
The Mystic is a Swiss-Knife hence his position during a fight is constantly evolving. Depending of the configuration of your group, you can be from Main healer to secondary DPS, be a Mana Battery or an Orb Spawning Runner. Be sure to adjust your crystals and auras depending on your role and your team’s need. A “in fight speed” boost is never useless if you can avoid being trampled.
 Teleport Jaunt
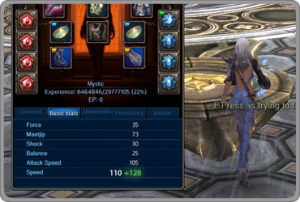
This is your “bread & butter” spell. This spell is everything for the Mystic’s longevity. With a bit of reactivity, even on Korean servers, or under heavy latency, you will be able to avoid 99% of the blows. With some practice, you’ll even be able to use it in an offensive way. Be sure to take the upgrade, this is probably the most precious tool we have. Being able to teleport twice in a row is just a life-savior when chased by anything bigger than you.
The Teleport Jaunt might be used to support a group as well. We’ll see later in the guide that orb arrangement is more like a science – the Spiritwalk is a nice “base step” to spawn orbs around a fight. You can even use it to jump onto other players to quickly deliver mana, buffs or aim right.
Aura of the Swift
Until you get level 50 and get Aura of the Merciless (AotM) this is probably one aura you should always have on. The buff will work during fights, and this is where it shines. Combined to a “in combat speed” crystal, you’ll be already avoiding most of the incoming damages. Never forget to get an “out of combat speed” crystal as well if you’re running a support / healing job.
Conclusion
Just be ready for anything, and when I say be ready, I mean it. Your lack of defense will not forgive much. Don’t forget to hit your burners when things are getting too close. Using the Teleport Jaunt to dispatch orbs, or support players by jumping into melee range might be safe, but before doing so, you must be sure of your aggro gauge.
How you’ll feel ending up stuck between your tank and the boss?
Mana Regeneration
Basically, this is where all starts. Without Mana, no spells, and without spells, no cookies! There are 3 different types or Mana income: Active, Passive and Reactive – and up to 5 ways to gain Mana as a Mystic. Let’s check that.
Passive Regeneration: Basic Regeneration
This is the obvious one. Each class has either a Regen or a Degen of Mana. Mystics, like all “Cloth wearing” classes, have a natural regeneration. The Mystic class has a 30 MP regeneration each second, plus the bonuses given by your weapon (2 at lvl 1, 21 at lvl 48 and so on).
Regardless of the amount, the Basic passive Mana regeneration will not exceed 1% of your Mana pool per second considering you have a stuff around your level. You can’t be counting only on this income of MP to get your group running, event solo this might be troublesome, considering one Aura cost 30 MP/2sec, two will totally freeze your Mana.
Passive Regeneration: Crystals
This is where the Crystals come handy! You might pick 3 different MP crystals. The first one is the sustained Mana regeneration each 5 sec. This is your best friend. As soon as you’ll be able to slot 4 crystals, you’ll see a nice addition to your Mana replenishment.
If I take the theory on a level 34 with 4 crystals, the standard crystals are +24 each 5 sec, meaning this is +19 MP/sec. With 48 standard crystals, it’s +23MP/sec. Now if you want to invest a little bit, which is maybe not a really good idea considering the fact Mystics are paper-armored, buying rare crystals will take you far higher.
At level 23, it’s +25MP/sec (consider I’m using 4 crystals and the first gold appear at level 27, so only for theory sake). For 35ish crystals, it’s a +30MP/sec bonus! Roughly, this is the Mana required for maintaining an aura. Both other crystals on the other hands are only viable if you’re a DPS. One will trigger on a critical hit in the target’s back. The other on a knock down effect. So in other words, using “Wrath of the Earth” like crazy, or always being behind the target.
As a Mystic, this isn’t going to happen a lot. If you’re running solo, you’d better want to slot other offensive crystals, like damage bonuses to standard mobs, or anything that suits your needs better.
Reactive Regeneration
This one is almost always forgotten; in Tera you’ll find a lot of stuff, armors and weapons, giving random bonuses like, 0.8% Mana pool regenerated when casting any spell or chance to trigger a Mana regeneration buff. Keep in mind all those bonuses are only situational. You can’t base your Mana regeneration on them at all.
Active Regeneration: Mana Infusion
Meet your mate! This is THE spell you’re going to use the most in Tera! You’ll get it really late in the game: level 2. So, how does this little wonder work? Easy, you have 4.5sec cast time to get the Mana treatment buff; you can cast it either in or out of combat. The only restriction is on the buff itself. Any hostile skill launched (like a Sharan Bolt (( was Spirit shot, our basic attack)) in the air) even without hitting anything will cancel the buff. Any direct damage income will also kill the buff, note that DoTs don’t dispatch it.
Let’s talk about the buff itself now! It lasts for 20 seconds and will give you 100 additional Mana each seconds for a total of… 2000 MP. I’m saying “additional” because it’s not canceling your basic passive regeneration, and will stack with triggered effects – even with potions.
It can be upgraded to give 20% increased ticks, getting the amount of Mana regenerated at 2400 MP. Considering the mechanism of a Mystic, and because this WILL be your only true MP regeneration solution, you will have to segment your gameplay depending of your use of Mana. I’ll come to it in a later part of the guide.
Active Regeneration: Essence Drain
That spell is a deception. If it’s powerful enough in the early part of the game, it becomes more and more useless as most classes are getting bigger Mana Pools. Basically, this spell has 2 components; the first one is a channeled direct damage in an Area around the caster. It will pulse 10 times, and damages will be dramatically reduced for each additional mob in the zone of effect. After the last pulse, the spell icon changes to reveal the second components. The same area is used to give a strait amount of Mana divided between your allies in the zone. As I said, in early game, the Mana amount is quite good, and frankly you’ll be loved for using it.
In the higher sphere, the spell is simply forgotten. I’m not even sure I’ve used it efficiently after learning the Arun’s Tear (Mana Orbs) skill. The Mana healing is for every ally in the zone, meaning that your pets, and ungrouped players will also be counted in the sharing. Be sure to teleport away from your pet/group mate if you want to be the only benefactor of the spell.
Active Regeneration: Arun’s Tear (Mana Orbs)
Be ready to be loved for what you now are! A light technician who will be able to light up every zone of the game – Transforming any combat zone in a real show. Seriously, this skill is awesome. Combined with some practice and knowledge of the other classes, you’ll be a leader on the battlefield.
The discussion about orbs placement and a Mystic leader role will take place later in the guide; we’ll focus on the spell and the self-use right now.
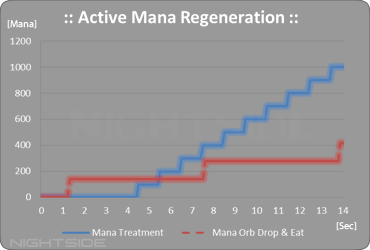
Costing 500 Mana, taking 1.3 sec to cast, and giving back a strait 639 MP to the picker – this is why Mystics are loved – this is also the WORST way to regenerate but the fastest one in times of need.
Let’s explain a little bit. For the Mana treatment, you’ll have the first 100 Mana after 4.5 sec after hitting the button, and you’ll be at +200 MP at 5.5s and +300 at 6.5s. If you were to create a Mana orb and eat it directly, you’ll be (roughly with the lag) at +139 MP at 1.5s after hitting the button, then, there is a 5 sec cool down, meaning that the second +139 MP wouldn’t be before time 8s.
Pretty lame huh? But I’ve not explained this just for nothing. There is a real utility in directly consuming a spawned Mana orb, and that’s the case when you are lacking the time to wait for 4.5 sec, or when a mob is chasing after you. If you’re lacking the Mana to cast your Life Thrall (Fairy spirit), think fast and spawn a Mana orb. With your natural regeneration, you should almost be able to summon it straight after consuming the orb. In the same way, 500 MP means only one heal and the waiting time to launch a second, 639 MP +1.5sec means almost two heals in a row, but will your tank will stand that long ?
Once again, this is pretty much situational, but knowing that fact has saved my ass multiple times. Of course, this is only a soft alternative; you could have taken a Mana potion. On the other hand, if you are soloing, spawning some orbs before a combat and consuming them during is a really handful way to replenish Mana during a fight.
Conclusion
You should now know everything about the regeneration of the precious blue fluid as a Mystic. Keep in mind that this chapter was only focusing on the Regeneration as a “solo” Mystic in a group.
Dispatching Orbs
The potion-drop system has been seen in several MMO’s recently. Most of European players are not yet used to it thought. The first thing you are going to learn as a Mystic is to communicate with your group. Not everyone knows that a Mana orb is suited for a DPS more than a tank or a support. You have to teach them, and I really mean it.
Mechanics
Ok, so we’ve already talked about the Mana orb in the Mana Regeneration section. For those who skipped that part, Mana orbs are not designed to be used by Priest, Sorcerers or Mystics as they only give a small 639 MP.
Archers, Slayers, Berserker, Lancers and Warriors however, are the one that might use them – with better results for pure DPS classes. Lancers and Warriors have to use their “basic” attack to generate aggro anyways. The others DPS’ers might not want to spend their life regenerating their mana, they’ll eventually pick blue Orbs.
About the Arun’s Vitae (Life orbs), I highlight the fact that the orb will dispel any negative effect on a player consuming it. Meaning that placing Life orbs near tanks might help them curing the Crushing blow DoT if you’re busy, dead or far away. In the other hand, combats are always evolving in random directions when facing Mini Bosses – as an excellent Mystic, you are to provide Orb support for your group, hence knowing where to place orbs for maximum efficiency.
Once again, you’ll have to communicate with your group so they understand the pattern you’re using to drops orbs. From here, there is a lot of ways to spawning orbs around a battlefield. We’ll focus on two “main” ones.
Fortifying Camps
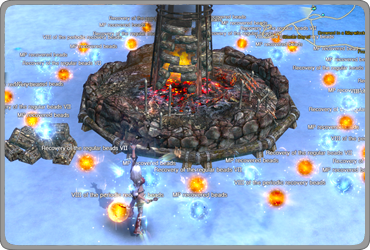
The first one might be the most common and the most intuitive. When bashing in an area you don’t want your orbs dispatched everywhere, or it will distract your group mates and they will be losing the focus on the battle searching for the orb they’re looking for. In this situation, I usually spawn between 1 life for 1 mana to 1 life for 3 mana.
What you want is a campfire, then, just spawns orbs right next to it. Stack the blue orbs together. In the 30ish a DPS class might only need 1 orb, but in the late game, they need at least 3. Expand a bit the Life ones. The less time it takes for a player to shop orbs, the more automatic the process will be, and you want to keep a difference between both orbs, I mean, something else than the color.
Players won’t always remember Life orbs give a HoT and consuming more in a row won’t help them at all – especially when the situation is critical. So basically what you want to do is to set a “Safe spot”, where players can quickly replenish Mana and Health and get back ASAP in the fray. This is mainly used against Small and Standard mobs, if you’re doing this with Big mobs, you might encounter a problem when eventually, the ‘biggy’ will want some orbs too.
One last thing, I used that pattern a lot back in the levels 30ish, but no more. Mainly because it makes everyone go toward the same spot. Meaning a low life DPS in distress might get ganked by a mob following someone already grabbing orbs.
Drawing Circles
One spot isn’t enough for most of the fights now, Mobs are fast and healing necessity is inconstant. So I had to get some time to rest and think clearly how I could shape a pattern obvious for anyone, useful and handsome.
And there came the “Orbs Circles”! Well basically it’s more of a hexagon, or some complex geometry shape, but we’ll call this a circle for the Holy cow sake. So, how does that pattern works? Fair enough, I’ll explain everything.
First of all, you have to understand the composition of your group, and then calculate how much Mana orbs they need to get from 0 to 100% MP, and how much damages may take during the fight. For a Slayer for example, at level 50, I would say 2 Mana and 4 Life Orbs. For a Berserker, 4 Mana and 2 Life Orbs. This gives us an amount of 6 Mana and 6 Life orbs on the field. The next step is to gauge the mob you’re going to hunt; do his attacks push people far away from each other? This step is up to your personal experience.
Begin by spawning Life orbs; drop them in a circle around the zone where the fight will be. We’ll call this the “Life circle”. Depending on the group composition and the size of the mob, you can add another layer of orbs, but one meter outside from the first one. Each orb must be spaced by about the distance of your Spiritwalk. Now let’s see the “Mana Circle”. Periodically, drop a Mana orb on the inside of the circle. When you’ve finished dealing with the “Life Circle”, you should get back where you dropped blue orbs and drop as many as needed to replenish the bigger Mana pool. Once again ignore, Priests and Sorcerers.
You should end up with a functional pattern or orbs that will help DPS heal themselves, wherever they are around the mob. With this, you can focus on your Tank and help DPS, even if you are the main healer. The only thing you have to be aware of; you will have to spawn back orbs when they’re popping off, or consumed as soon as possible. If your tank is pushed away from the center of the circle, he’ll land in orbs, and might use them the time he’s replacing the mob.
Aggro Management
Like anything in the game, the aggro is well done. There is not really any calculation that has been made yet, be sure that dropping an Orb, Life more than Mana, do get you up by a fair amount in the aggro list. If you never heard the term ‘OVERAGGRO’, you’ll quickly understand its true and deep meaning. As a mechanism, a part of the aggro is generated when you begin to cast the spell, this is why you want to drop as many orbs as possible before a fight.
The aggro system is based on a ‘per period’ rule, that’s what I can come up with. Meaning, if you need to heal like crazy, you’ll have to watch when your tank is taunting or, when your berserker (who’s trying to tank) will slash the mob so don’t over aggro. Orbs are phenomenal on aggro generation, be sure to pop them when you’ll be totally forgotten by the mob.
Pet System
The Mystic Pet System is relatively simple. Probably too much. You have 4 pets at your disposal: 1 Tank, 1 Healer and 2 DPS. Each one will assist you when they’ll be summoned. Let’s check in detail how they work.
Thrall of Protection (Tank Spirit)
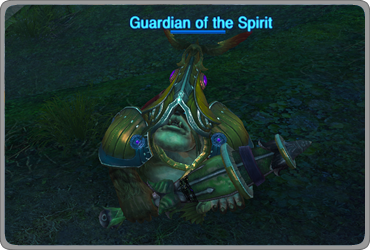
The very first spirit you’ll have. It proves really useful when you’re soloing. The Guardian is the Tank, and will generate a great amount of threat but almost no damage. It will constantly assist you, meaning that if you do any hostile action toward a mob, the Spirit will attack it.
Be aware that a Mesmerize IS a hostile action, meaning you have about 50% chance that the Spirit is going to rush & hit your Mez. Its behavior and pathway make it almost always aggro packs of mobs when traveling – and if you’re already attacking a new one, it will bring all its friends in your aggro range. In the early game, channel swap to dismiss it.
Thrall of Vengeance (Lightning Spirit)
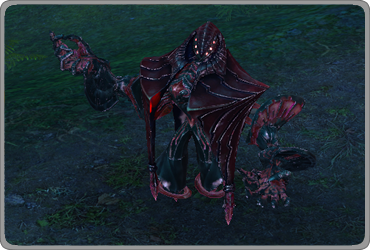
This is the second spirit you’ll get. It’s a ranged DPS, dealing a fair amount of damage but not really useful at all. The Mana investment is quite too much for the damage it deals. It can be used as a ‘preventive’ aggro while blasting a pack. When summoned, he’ll pop 6 meters away from you in the direction you were going OR looking, meaning that he’ll get the first aggro tick from mobs.
However, summoning a spirit is not a valid ‘hostile’ action. Technically, you will be able to summon it without breaking the Mana infusion, which is a good deal to continue help dealing damages while regenerating. But Isn’t that great ? Regenerating mana to heal a group and wasting it in a pitiful useless spirit ?
Of course, if you want to achieve the maximum DPS as a Mystic, … erm this is painful to say… you will need him up… (or… not).
Thrall of Life (Fairy Spirit)
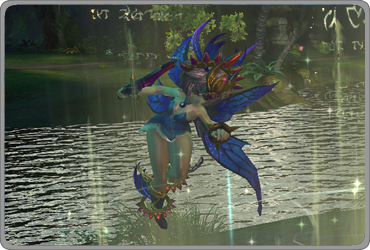
Probably the Spirit you’re going to use the most. This little fairy is, in fact, a priest! Upon summoning, she’ll try to stay near you, throwing every support spell she has. If you let her heal you the full 15 seconds she’s up, you should be 100% life or almost.
The Fairy will :
- Dispell,
- Single heal (self heal)
- AE HoT
- AE Major Heal (small circle)
- Single heal
- AE dispell.
The pattern sometimes varies, but be sure that the first 2 things she’s going to do, are a single dispel on you, and a ‘single heal’ – looking like the Priest ‘Self Heal’. In most of the fights, it will be quite hard to get allies in the major heal circle. You should just keep the fairy for yourself. The Fairy will ‘work alone’, meaning you can still focus on your mates while she’s getting your life up.
The position the fairy spawn is always the same, by understanding this, you’ll be able to almost heal like a priest – well, don’t dream 😮 – I’ll cover this part later in the guide.
Destruction Spirit
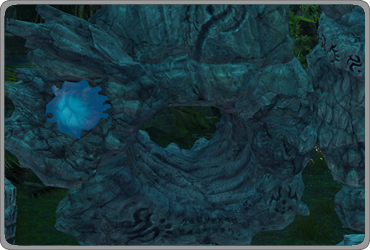
This Spirit is a cool addition to the Mystic, and be sure most people will be frightened by the Golem the first time they see it, yelling “ADD ADD” everywhere and dodging the red circles on the ground.
So, this ‘Destruction Spirit’ is a stone golem, when summoned it will assist you by attacking once your last target. Be sure to have already done an offensive action before in the fight, or the golem will probably just sit around for the lousy 5 seconds where it stays up. So far, I only saw 3 types of attacks, the artillery one (yeah with those 3 circles on the ground), the main ranged attack and the… hum… jumping-stone one, which is the scariest one for your melee friends.
As soon as the attack is complete, it will probably get back to you, or follow you and pop out. The damages are quite impressive. I’ve seen some 50k damage on a crit once (mob same level as the spell). The only bad point is the cool down. 10 minutes is nothing close to bring this spell in the ‘useful’ group. This is a situational only pet, that may only save a 1% boss wipe, or helps you bash 10+ mobs at the same times killing half of them on the spot.
Be aware that it was possible to make this biggie hit twice if you ‘spawn’ him right into the fray. Nevertheless, since the 17-03-2011 patch I’ve not seen him doing it.
Conclusion
So, if the Spirit System is quite automatic, it’s far from being a ‘great’ aspect of the Mystic – but you can call this a Toolbox. You don’t want pets that can’t be controlled, breaking random crowd controls. Except for f the awesome Fairy, all others are only situational.
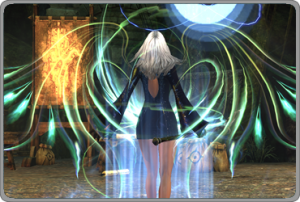 Auras and Buffs
The Mystic is mainly a support class, meaning several of his buffs should be ‘supporting’ at a point your party. Up to level 50, the Mystic has only 4 auras and 1 buff, let’s check them!
Buff
Let’s begin by the lonely buff you’ll have. The ‘Titanic Wrath’ is just kicking butt… until you have seen the Priest version. In my opinion, this spell is just broken.
Priest has a 17% bonuses to the attack power. We have better : 20%. Yay! But it’s finished now. Priest can buff, in an 8m circle around them, for 15minutes for 675MP, we can only buff allies in a 6m circle and for… WTF? 25 seconds? and… HOLY CRAP 875MP ? Seriously, this is ridiculous.
However, I have almost never played with a Priest, meaning this buff, was the only one I had to constantly maintain of my mates. This is doable. It will kill your Mana pool. But il will accelerate most fight dramatically. So, if you’re not planing to play with a priest, I suggest raising the upgrade so you can buff for 35seconds (or such) and be ready to have a hardcore time with your Mana.
Auras
Finally, some useful buffs. You’ll have 2 different kinds of Auras, and 2 Auras in both for a total of 4 skills. Only one benefit from an enhancement.
The first two ones are the Unyielding (Fog) enchantment and the ??? (Spirit) enchantment. You can maintain only one of those two auras. In the mid game, you’ll only have the Unyielding (Fog) one, protecting for 30/40% critical hits. Later, you may want to switch to the ??? (Spirit) one, helping A FREAKING LOT your mates. The Aura will give 20 Mana/tick to all your group, which is a lot for DPS classes. This is also the time when you’ll slow down your Mana Orb generation.
At this point, most of the people compare the aura to Crystals and find it useless. As a reminder, crystals are X MP each 5 seconds, and X is not higher than 38 for the rare version of the level 48 one. Comparatively, each 5 seconds you regenerate 100 MP, which is, really, a lot!
The two others are the Swift (Quickness) and the Merciless (Rage) one. Personally, I have the Quickness on every time I’m not fighting, or not fighting hardly. As soon as I’m hitting some serious fight, i’m switching to Rage. You can’t really want to miss the huge boost it gives.
You should be aware that Auras have a 20m range. Meaning, you have to place yourself in order to maximize the effect for your group. This might not always be easy. The ??? (Spirit) aura will nullify the Beserker loss of mana, always stick near them and they’ll be able to socket damage dealing crystals.
Gameplay
Welcome in the most worked out section of this guide. Now that we’ve seen the mechanism from a neutral (sort of) point of view, I’ll talk (more?) about my experiences and the perception of the class I have.
Actually calculations have been made after 30/50+ hours of bashing. It’s been done on level 48 non elite mobs. I might add that those calculations are restricted to this website, as I’m not planning to share false or half-false information.
Most of the Theorycrafting I’ve done for other Games (like Wow on Elitistjerks) has taken me months of bashing, to understand every mechanism and variable. So please, be aware that all those results are only here for scale, and not (yet?) for precise calculations.
Tips & Tricks
Damage Calculation
From what I’ve seen, damage calculation is quite simple. I’ve taken out bonuses on gear and crystals, because it’s easy to add a fair % to your DPS, and you know what you’re going to seek. The weapon is what gives you the most ‘upgrade value’, and this is why all weapons are overpriced. You to DPS more ? Get a new weapon.
Itemization
From my point of view, it’s useless to begin enchanting before level 30/35. I’m telling this not to shock everyone, but I wouldn’t enchant stuff before the maximum level. The stuff in Tera is renewed quite fast, a Golden 27 is not as a good as a Rare 31, and only a couple dozens of hours separates those levels. Will you invest all your millions in +6 that will be useless in less than a playing day ? I wonder.
However, I must admit, some Golden stuff has really interesting bonuses. And, as heals aren’t scaling at all with your stuff, you might want to hold that staff regenerating a lot of mana for some times.
But this is already a ‘group’ mechanism, because you’ll switch to a higher level weapon to max damages as soon as you’ll be alone.
Scaling
So, this topic could be an Everquest or even a Meridian one. We’ve seen every MMO’s guides talk about skills and DPS – Damages per Second that is, literally – and then we all have upgraded our gear and.. WTF?? Surprise! the DPS wouldn’t increase by the freaking lot we would have imagined.
This is because DPS upgrade is scaling with gear upgrade OR NOT! Some of the spells, and especially DoT’s and Pet’s when MMO are release, are kinda broken, and won’t follow same rules as every spells. Regarding Tera, Mystic’s Cruse of Agony, and Pets are standalone spells. Which means, they’re not scaling with your attack power – this has been confirmed.
You will see them scale, and shout ‘lies’ however it’s because in PvE on Tera the level IS playing a part in damage calculation. So, once again, those calculations i made, are with ‘low 50ish stuff’. At the beginning you might want to put DoTs, and get the lighting out, but… when you’ll have a decent Golden Lab Scepter, or some crafted +6~9, you… will totally forget them.
Spreading Damage
So yeah, in Tera most of the spells are a little bit of an AoE. I’m not sure about this mechanism for other classes, but it seems similar to me. Spells that will hit a second, a third or a fourth target will see their damage reduced by a strait amount. The actual theory-crafting reveals it as a fair % based on the maximum damages. Independent to attack power, spell power, distance or level.
These are the values:
- 1 Target : 100%
- 2 Targets : 80%
- 3 Targets : 60%
- 4 Targets : 45%
I will refer to them as “Standard spreading”.
Soloing & Duoing
So, what about soloing huh? Well, this is basically the only way you will be able to DPS properly. The Mystic is far from being a power-house when we’re taking about DPS, but actually, you can put up quite a bit. Let’s see what weapons do we have to bash everything’s around us.
DPS Cycles
So, if you skipped everything to just get the fruits of my experience, I can already tell you that without a doubt, the main DPS sequences for a Mystic are theses ones:
- For most of the mobs : M.Smite > M.Blast > Sharan Bolt
- For bigger mobs, you can go for : Volley of Curses > M.Smite >M.Blast > Sharan Bolt
And there are so many reasons. I’ll explain everything in the next sections. As a quick call:
- This chain will work on everything, Pockets packs, Med + Pockets, 2~8 Meds or either Mini Bosses and of course Elites.
- Begin with 3 stacks of the Curse of Agony on every elite mobs, or though Meds you’ll encounter, and try to maintain them.
- Do NOT spend your life maintaining the Curse of Agony, depending on your stuff, it’s damage output difference might be low.
We dispose of 5 direct offensive plus 1 pet (and a half).
Sharan Bolt
 This is our very first attack and the one we’re going to use… well almost anytime. The DPS output is only getting killed if you’re at more than 10 meters of your targets. You might want to upgrade it for the 25% more damages. Be aware that the +25% bonuses only apply to the spell attack power, and not to the overall attack power used in the calculation of the damages with the spell.
So, anytime you’re going to hit the button, you have to be within 10 meters of your target to max out damages. This spell is instant but has an animation, and this is where you gonna meet your old friend: the latency.
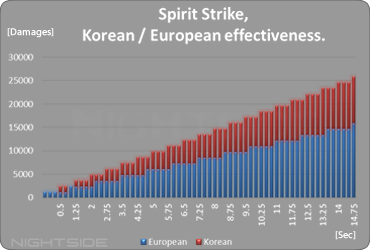
With my “Theorycraft” setup, the spell hits for 1228, but it takes more than 1 second to reload and cast against, exactly 1.28 sec. An actual Korean player only have 0.90 sec of animation, gaining around 60% DPS. This is of course, approximate, but from comparison to several Korean players, it always has tend to those numbers. Yep, this is crazy.
Anyways, this is also why this spell is going to be the last to use, when nothing is up. There is also no spreading as the bolt is going to hit the mob you had under the cross-hair when launching the skill.
- Spamming European : 1064 DPS
- Spamming Korean : 1719 DPS
Spirit Wave
 The second attack you’ll gain, and the first AoE. Be aware that the two waves launched haven’t the same range. The first might hit a target when the second doesn’t. You might want to upgrade it for the 25% more damages. Be aware that the +25% bonuses only apply to the spell attack power, and not to the overall attack power used in the calculation of the damages with the spell.
We are still in the same case as the Spirit shot, with the heavy latency. However, this will be far less affected because of the cool-down. Let’s talk about the spell.
The 2 waves are consecutive, but the second one is the one that does less damages, has also a shorter range, about 3 meters front and 1 meter side. Damages are spread independently. If you hit 3 targets with the first wave, you’ll have a 40% damage malus on its damage, while if the “small wave” hit only 2, its damages will only be reduced by 20%.
The damages of the “Small wave” are about 43% of the “Big wave” damages, so you really don’t want to miss them. Spreading damage looks “Standard”.
Wrath of the Earth
 This is the most powerful attack Mystics have, combine that with a nice knock-down chance and you end up with a decent spell. This will why you want to stand as close as the battle as you can when soloing/duoing. You might want to upgrade it for the 20% less cooldown. It will make you only gain 1 sec, but it’s a nice boost.
This is our mighty powerhouse. Yeah we do have one between a bunch of useless spells. The upgrade is really a small one, you might want to think about it. To help you, here’s a small chart of the boost in the DPS you’ll notice. You’ll notice the upgrade does boost you DPS by about 20% which is greater than expected.
There is not much to say except the area of effect is quite small, better to be careful, especially when trying to hit 2 mobs and aiming ‘between’ both, you’ll end up hitting none more than one time. The DPS value of the standalone spell is not to consider here, because we gonna use the spell only when up.
Specs :
- Most powerful spell,
- High knock-down chances,
- Standalone 1164 DPS,
- Standard Spreading.
Spirit Drain
 Once again, this spell is a joke, well, until you’ve got enough attack power to make it worth. If we’re going for straight damages cycles, you can forgot this one, the not upgraded Spirit strike will hit harder. Forget upgrades if your aim is to get maximum DPS output.
This skill is simply of no use actually here. The DPS is simply too low, considering the fact the spell roots you in place. Not talking of its absurd range. Channeling it will block you from moving or applying the Curse of Agony. Spamming the Spirit Strike is far better, and if you need mana, pop a pots.
Specs :
- Channeling required,
- 10 ticks, approx 744 DPS,
- Spread damage dramatically reduced.
Curse of Agony
 This one is a nice addition to the Mystic’s skills, but is it really effective? You should get the additional time upgrade, it’s useful in every situation.
So, this is our only Damage over Time, and that’s the shame, because it’s not scaling with gear. Once again, we’re on the wrong side to maximize the effect. We know that the targeting is at least half a second faster in Korea, and you will always have to lock your targets. If you add this the animation time (you can move during the animation), and the 3 launches requirement to get it to max DPS, then you’ll roughly lose 6.5 seconds.
I would have loved to compare this to something like… say the Spirit strike. But you can see that on an European server, the Curse will still only be an ‘addition’ to Mystic DPS. I will as well pass the explanation about how reapplying it. You can guess with that level of latency, trying to wait the last second it is just a dream.
For the sake of knowledge as well, Koreans apply the Curse in 1.5 second. This is as well a 60% upgrade (yeah, approximately).
Specs :
- 3 stacks : 867 DPS
- 6.5 sec to raise,
- 2 sec every 10/12 sec to maintain.
Spirit Summon: Lightning
 Hail to the most useless skill we do have. Really, you’d better be ready for something in competition with the “Firecamp Seeker” of the Priest. His attacks aren’t scaling with anything, and work like a spirit shot. Meaning if you want it out of harm in a fight, it’ll eventually do fewer damages due to range.
As a reminder, the pet does spawn 6 meters in front of you when summoned, meaning that if you’re not careful, and pops it too far away, you’ll lose 15% damage. The pet only launches 5 attacks, and like the Curse of Agony, this is by no way scaling with our attack power.
So, now the numbers… 5 attacks for 1548 are… ack… this is painful. Imagine just a second the Game Designer that thought of this spell ? Or eventually the intern that balanced it? Anyways, the pet stays 17 seconds, and that’s what it’s going to cost.
Specs :
- Primary Mystic waste of Mana
- Premium DPS : 455 DPS
Conclusion
Hopefully you found this post useful. All credit for the guide goes to Manta of Nightside guild! Note that some of the information in this guide is subject to change.
If you have anything to add to this guide, feel free to post in the comments below.
Don’t miss out on this amazing Mystic guide! It’s chock-full of tips, strategies, builds, guides, and secrets you will definitely love hearing about!
If you already know all about Mystics check out this Tera strategy guide as well.


When was this Mystic Guide written please..
It would be VERY helpful if it is not too old.
Thanks for Writing it.. I know MOST of the info is probably good.. but which?
Peace.. Lyn
This guide was made before Tera Rising was released unfortunately, making it very old. How do I know this ? Her description for Arun’s Vitae and Tears states the cooldown as being 5 seconds, and since Tera Rising, both were changed to 8 second cooldowns.